Update on Robot Run
The last week has been a slow and steady one in terms of game development, not a lot has been done on the game itself but things have been happening in the background. First of all, I have been designing ways of implementing some really cool game mechanics. Nothing to be revealed as of yet. I have been working on making something unique in this game that stands out from all the other platformers you see before you today.Another thing is designing levels. Making them functional and playable with a lot of variations is getting harder and harder, its finding the easiest way of making every level harder than the last. This is going to be a major part of how Robot Run performs.
Another great thing is that I have been in touch with some talented artists to design enemies for the game. Its all coming along quite well and hopefully should produce some great results.
Thanks for reading.

Switching Scenes Using Left Mouse Click C# in Unity2D
There is more than one way to change scenes in Unity. In the previous post, "Moving Between Scenes in Unity2D C# Script" we discussed how to change scene using a 2D box collider to trigger a script to take us to another part of our game.
In this post, you will learn how to set up a left mouse click trigger to switch scenes. This is ideal if you would like a menu screen for your games. These come in handy especially if you are publishing your games on internet portals.
 1. First make sure you create two scenes. Name them whatever you like. To keep them organised, I named mine "Level1" & "Level2".
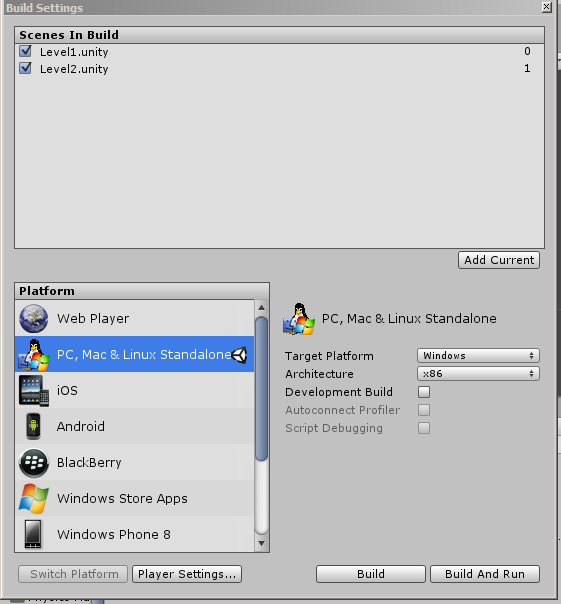
2. Now that you have your scenes created. You need to implement them into your build settings. First go to File, then to build settings. In the image on the left, you can see I have already implemented my scenes in my game. For a fresh game, this should be blank.
The next thing you need to do is to make sure you have your first scene open in Unity. Then select "Add Current".
Now you have to add your second scene. For this, close down your first scene and open your second. Repeat step 2 so you have both of your scenes in the "Scenes In Build" box.
After that's done, click the "X" in the top of the window.
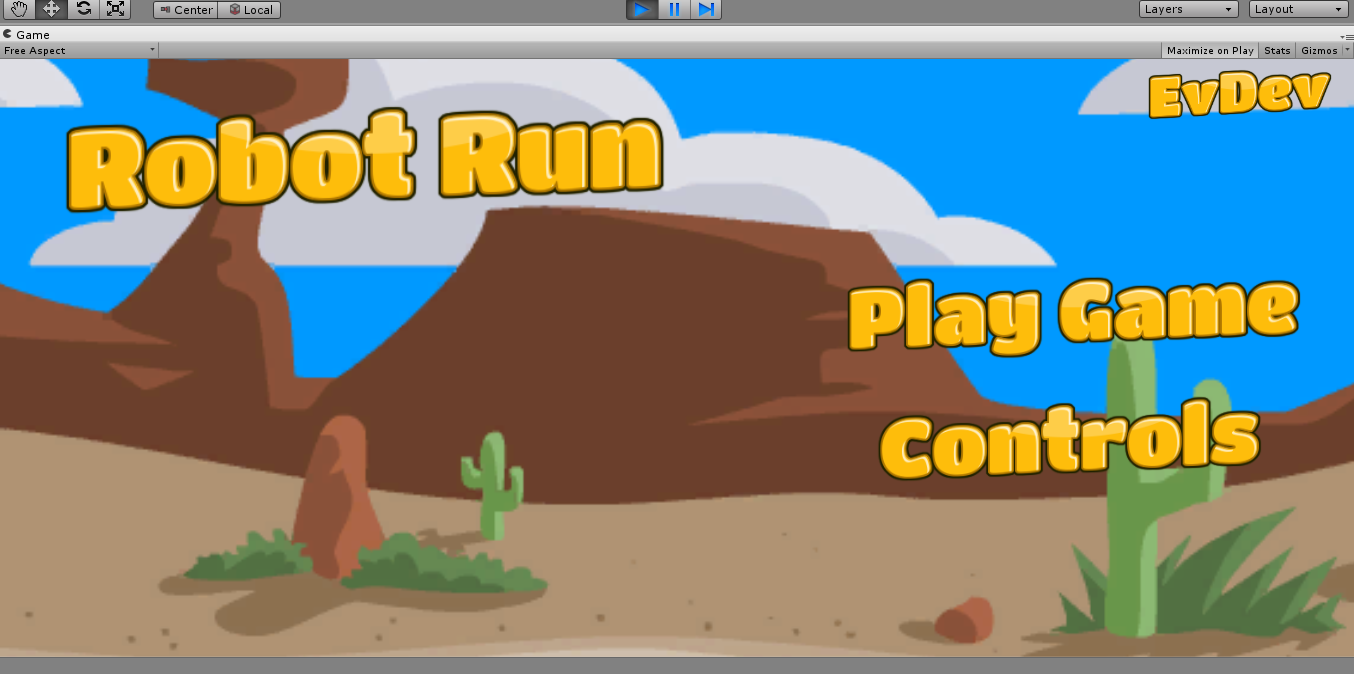
3. Now we need to set up what we want to be clicked to take us to our next scene. For me, I decided to make buttons for mine, These as you can see in the image on the right, "Play Game" & "Controls" using the script below, using the left click on your mouse will take you to different scenes withing the game.
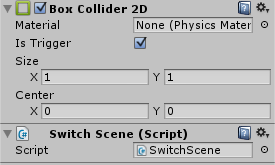
4. Select the button or object you wish to be clicked, then select; Add Component in the inspector, select "Physics 2D" and then select Box Collider 2D and set this to a trigger.
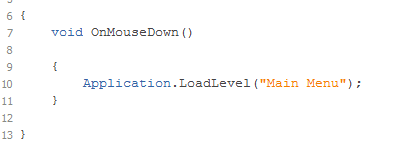
5. Now for the fun part. Create a new C# Script and call it "SwitchScene" and input the following code:
7. Test the scene and enjoy.
C#
,
Game Dev
,
Learning
,
Unity
No comments
2D Platformer in Development
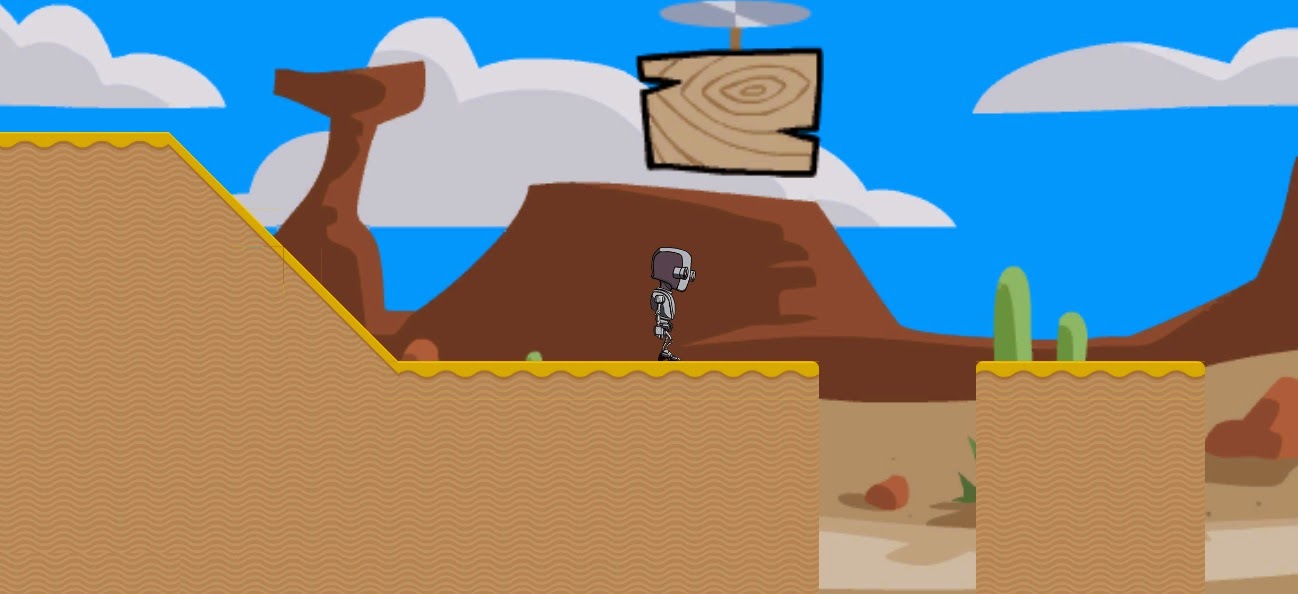
Evans Development Entertainment is proud to announce the undergoing of a new game. The yet titled 2D platformer is created using the Unity Engine with a demo expected the end of November 2014.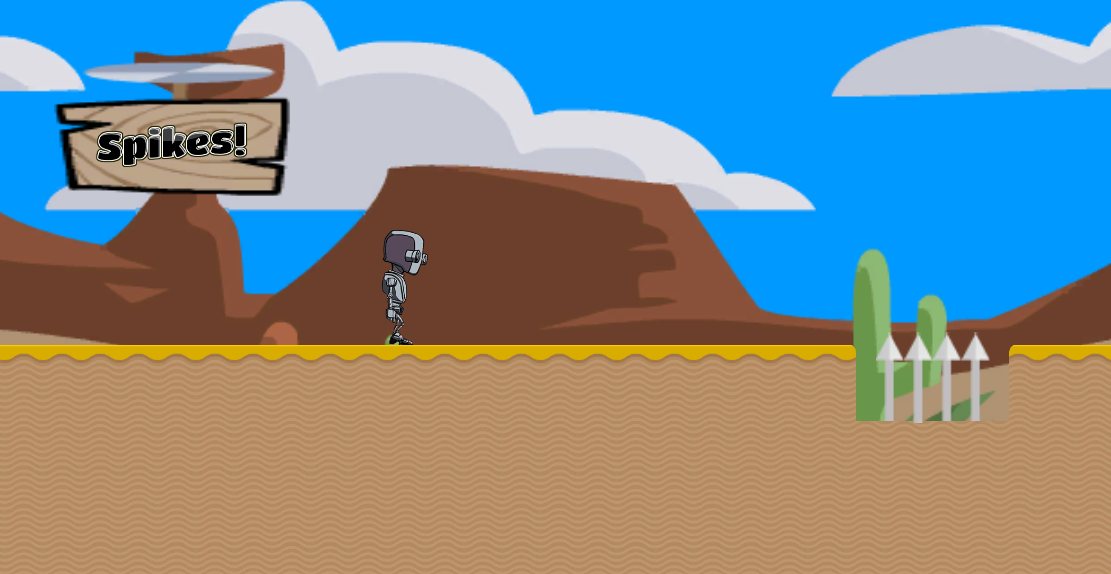 The demo will be available on numerous online game portals with more info to follow nearer the time. The full version will also be available on game portals and possibly handheld devices.
Game "X" allows the player to travel through various levels to help a robot in one of the most strangest environments for a robot. In the middle of the desert, you must travel to find your way back to home.
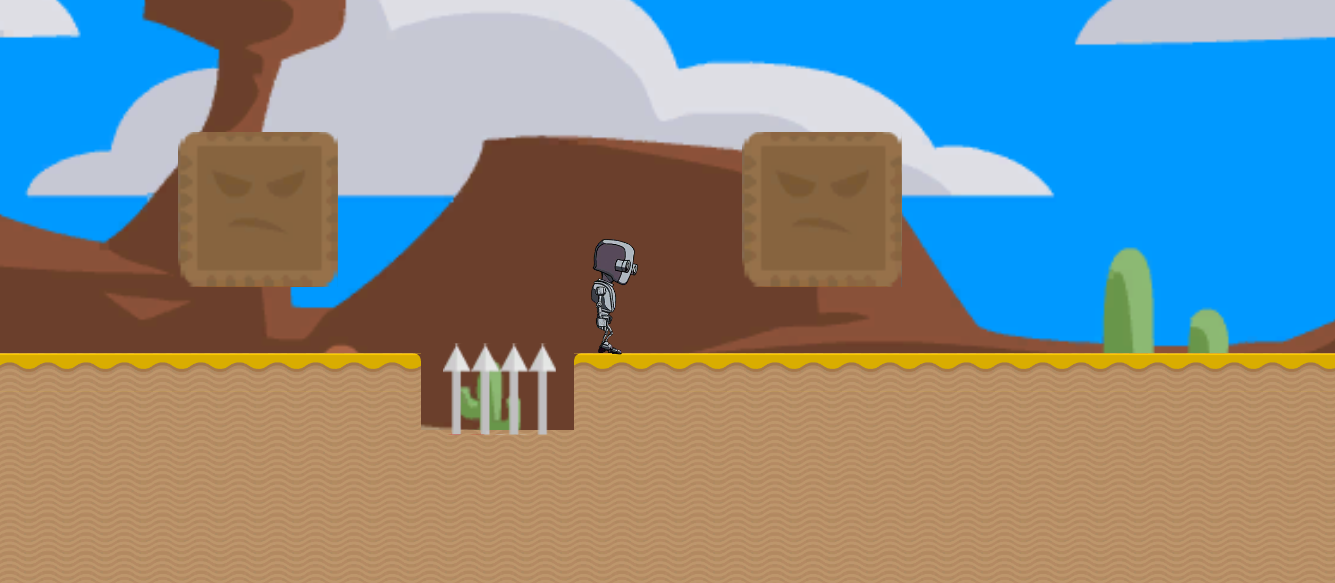 The game includes various enemies, traps and crushers that will try and stop you achieving your goals.
More news to follow...
Why not join GameDevMarket.net?
Put simply, we want to create one place for independent game developers to be able to find high quality assets for their game projects, regardless of their experience, budget or the engine they’re using."
Sounds interesting right? Well if you are looking to join, why not visit the website here.
Moving Between Scenes in Unity2D C# Script
Moving between scenes is vital for any good 2D Platform game. The player is certainly going to want a variety of levels to play and you, the developer need to keep your players interested. Today I am going to show you how you can do this using C# language in Unity.
Click to enlarge screenshots
1. First make sure you create two scenes. Name them whatever you like. To keep them organised, I named mine "Level1" & "Level2".
2. Now that you have your scenes created. You need to implement them into your build settings. First go to File, then to build settings. In the image on the left, you can see I have already implemented my scenes in my game. For a fresh game, this should be blank.The next thing you need to do is to make sure you have your first scene open in Unity. Then select "Add Current".
Now you have to add your second scene. For this, close down your first scene and open your second. Repeat step 2 so you have both of your scenes in the "Scenes In Build" box.
After that's done, click the "X" in the top of the window.
3. Now we need to create an empty game object where you want the scene transition to take place in your game. 4. Select Add Component in the inspector, select "Physics 2D" and then select Box Collider 2D and set this to a trigger.
5. Now for the fun part. Create a new C# Script and call it "SwitchScene" and input the following code:
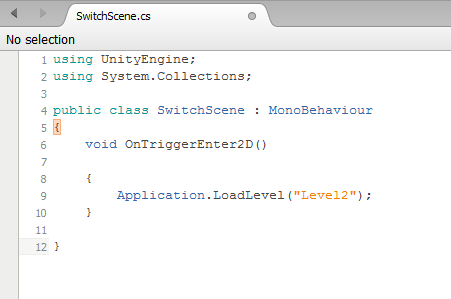
Notice after "Application.LoadLevel", my code says "Level2" input the name of the scene you want to switch to.
6. Add this code to the empty game object we created earlier.
7. Test the scene and enjoy.
C#
,
Game Dev
,
Unity
No comments
Subscribe to:
Posts
(
Atom
)
No comments :
Post a Comment